Bubble Painting


What You Will Need

juice glass
3 tablespoons of warm water
6 tablespoons of dishwashing detergent
6 tablespoons of paint
fork
straw
plain white paper


Instructions

1. Add the dishwashing detergent, paint and warm water to each other.


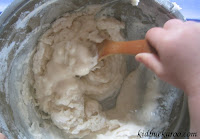
2. Mix well with a fork.


3. Using the straw, blow into the solution to make bubbles. If a young child is doing this, stress to him/her to blow not suck into the straw and use close supervision.


4. Blow until the bubbles are over the lip of the cup.


5. Carefully place a piece of paper over the rim of the cup, bursting the bubbles onto the paper. The paint bubbles will leave a mark like this:


6. Repeat steps 4 and 5 until the project is finished.


7. Repeat the process (steps 1 - 5) with different coloured paints, using the same paper in step 4, for more interest.

8. Let dry.

Ladybug Nursery Rhyme


(common/fair use image)

Ladybug! Ladybug!
Fly away home.
Your house is on fire.
And your children all gone.

All except one,
And that's little Ann,
For she crept under
The frying pan.

Forming Clay


(Flower made with this clay recipe.)

What You Will Need

2 1/3 cup flour

1 1/3 cup salt
4 teaspoons powdered alum
2 cups boiling water
4 teaspoons vegetable oil
mixing bowl and spoon


Instructions

1. Combine the flour, salt and alum in a mixing bowl. Mix well.


2. Very carefully add the boiling water and vegetable oil.


3. Blend well.


4. Knead until smooth.


Additional Details

The wet-clay should have a consistency similar to bread dough.


Alum can be found in the spice isle of better stocked grocers. It is a pickling spice and not always readily available. (Kid Buckaroo Craft Tip:You may substitute alum with cream of tartar, if necessary.)

This clay will last for weeks in the refrigerator, if stored in an airtight container or freezer bag.


Projects will take 48 hours to dry well.

An unpainted sample project made with this clay recipe and air dried:


Funny-Bunny-Linda Cake


What You Will Need

1 white cake layer (circle shape)
1 white cake layer (heart shaped)
2 tubs of white icing
red food colouring
2 green gumdrops
1.5 cups of shredded sweetened coconut
2 - 3 pieces of red licorice
1 piece of black licorice
sharp knife
icing spreader
small bowl
large rectangular serving tray


Instructions

1. Cut the circle-shaped cake layer as in the following photo. Set aside the middle bow-tie shaped piece of cake- you will not need it any further in this project. The outside pieces will be the bunny ears.


2. Put the heart-shaped cake layer on a large tray and lay the bunny ears in place.


3. Frost the cake.


4. In a small bowl, tint 4 tablespoons of icing with 6 drops of the food colouring


5. Frost the inside of the bunny ears with the pink frosting.


6. Sprinkle the entire cake with shredded coconut.


7. Decorate the face of the bunny using sliced red licorice for the whiskers, black sliced licorice for the curled mouth, gumdrops/cut licorice for the eyes, and a black 3/4" piece of black licorice for the nose.


This Funny-Bunny-Linda is perfect as a birthday cake, an Easter cake, or a birthday-near-Easter cake!

Mystery Gift Guessing Game

What You Will Need

a box with a lid
mystery gift (something sturdy, not easily broken, which will be the prize to the winner- in this example we are using a wooden-frog castanet)
length of string long enough to wrap around the box twice and tie


Game Set Up

In secret, place your mystery item in the box and tie the string around the box to secure the lid in place.


Give the children question suggestions, to help them understand how to play the game... such as "Can I eat the item?" "Do I play with the item?" "Is the item soft?" "Is the item colourful?"

You can decide if you want the answers to be 'yes/no' ones or if you want to give more detail to the children.

How to Play

1. Have the children sit in a circle. Pick a place to start, maybe at the youngest child, and give them the box to hold.

2. Chant together as a group:

What could it be?
What could it be?
In the box handed to me.
3. The child can shake, rattle, roll, and slide the box back and forth. Then the child gets to ask you one question about the contents of the box and take one guess at what the mystery item may be.

4. If the child guesses correctly, they get to open the box and keep the item. The game can be continued with a new item being loaded in the box.

5. If the child doesn't guess correctly, the item is turned over to the next player in line who repeats steps 2 and 3.


Additional Details

Some mystery item suggestions are a rubber ball, a bag of chips, candy, a small toy, a small book, etc.

Tin Foil Card


(card by Thomas, 2 years old)

What You Will Need

glue
handful of uncooked rice
tin foil
scissors
string, about 20 inches long
heavy paper, card stock if possible, about 12" x 7"
construction paper, about 6" x 6"


Instructions

1. Cut a piece of tin foil and the construction paper to be the exact same size. In this example they are 6"x6".


2. Fold the heavy paper in half. Crease the fold well.


3. Draw a simple pattern on the construction paper. In this example we made a square.


4. Smear glue over the entire surface of the construction paper. (Kid Buckaroo Craft Tip: Tape the construction paper to the table. This will stop the paper from moving about as your child is working with it. A loop of tape, or two, on the back of the paper works perfectly.)


5. Place the string over the lines of the object that you have drawn. Trim string as necessary.


6. Pour the rice inside the string lines of the object.


7. Spread the rice out evenly and remove any rice grains that may have fell outside of the stringed lines.


8. Carefully place the tin foil over the construction paper and press down. Smooth over the tinfoil pressing and rubbing the tin foil into the shape below. Gently run your fingernail along the outside edge of the string, to give more emphases to the shape.


9. Glue the tin foil art onto the centre-front of your card.


10. Sign the inside and give this card to someone you care about.

Additional Details

If the tinfoil gets ruptured by a piece of rice, during step 8, simply cut another piece of tin foil and glue it over the ruptured piece.

Simple shapes are the best to work with in this project - circles, hearts, triangles, etc.


Fruits Toots


What You Will Need

3 cups of vanilla yogurt
1 banana, sliced
8 strawberries, sliced
1 cup of milk
2 kiwis, skinned and cubed
2 tablespoons of lemon juice
blender


Instructions

1. Place the banana, kiwi and strawberries together in the blender.


2. Blend well.


3. Add the milk and lemon juice. Blend well.


4. Add the frozen yogurt.


5. Blend just enough to smooth about half of the yogurt, leaving some chunks of yogurt.


6. Serve immediately or chilled.


Additional Details


This makes about 5.5 cups of Fruits Toots goodness.

This drink is rich and filling, best not to serve it to kids too close to mealtime!